What are Extensions in Joomla
Joomla! content management system (CMS) core features are enough to create powerful and dynamic websites. How ever, it is possible to extend Joomla’s functionality and add extra features, using Extensions.
There are five extensions types for Joomla! and each one is used to achieve different functionality:
- Components
- Modules
- Plugins
- Templates
- Languages
Five ways to install extensions
Joomla! 3.x offers five ways to install extensions
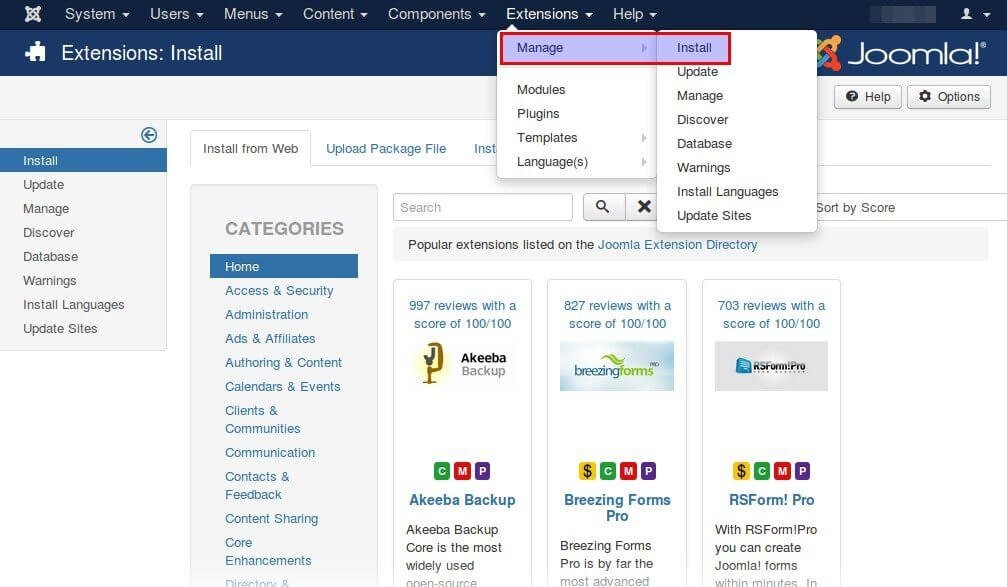
All of them can be accessed by the Extension Manager: Go to Extensions > Manage
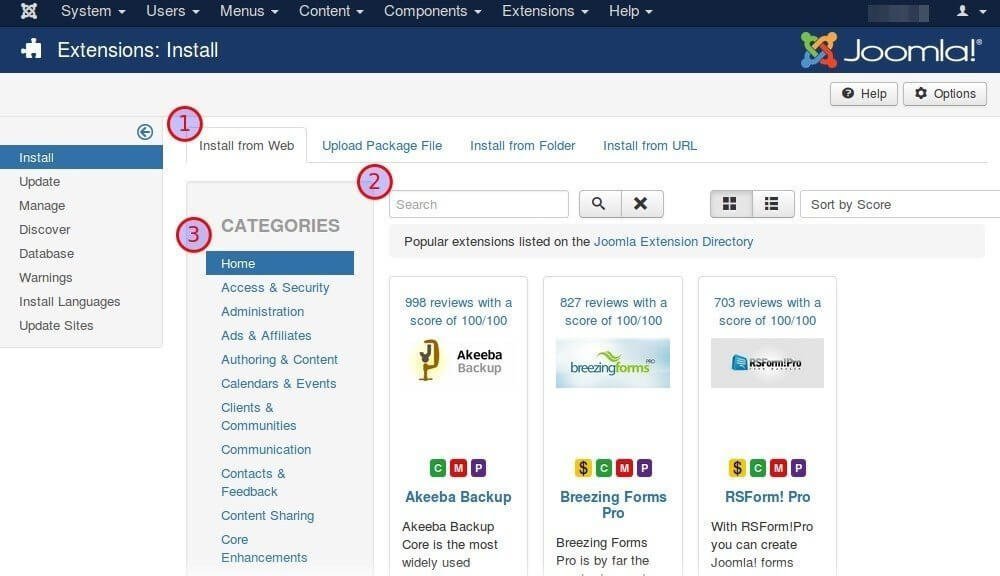
1. Install from web
Go to Extensions > Manage > Install > install from Web tab 1
This method allows to install extensions directly from the Joomla Extension Directory. Although is the most convenient method, it is not available by default. You can simply install it by clicking at the notice on the top of the page when you visit the Extension Manager. This method supports Joomla! 3.2 and later versions.
There are thousands of available extensions. You can find the ones you want using the search field 2 or you can browse extensions by Category. 3
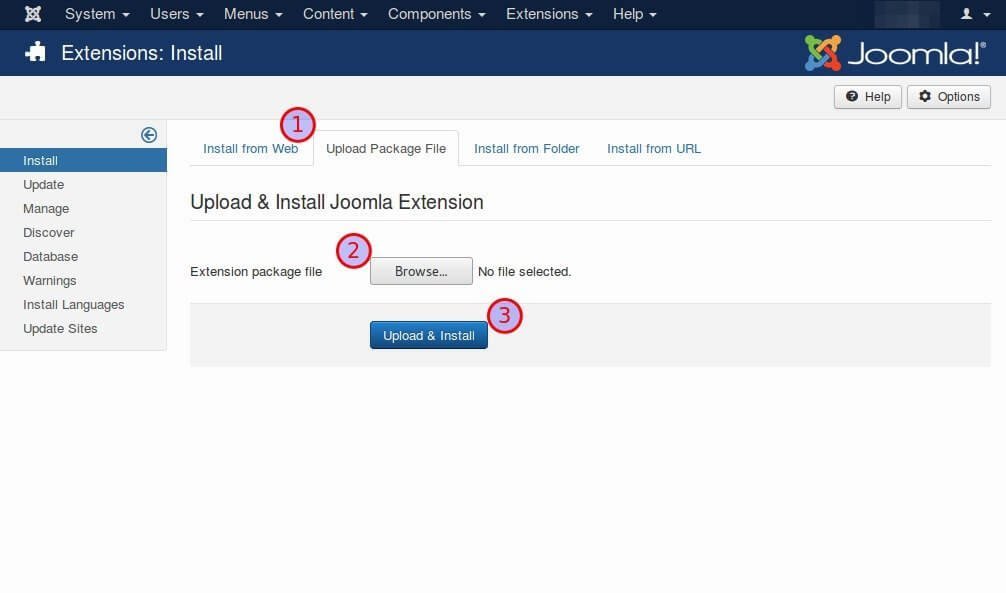
2. Upload Package File
Go to Extensions > Manage > Install > Upload Package File tab 1
It is the basic method of installing extensions. It allows to upload .zip files from your computer, which have previously downloaded from the Joomla Extension Directory.
- Click
Browsebutton 2 - Select .zip file from your computer
- Click
Upload & Installbutton 3
3. Install from Folder
Go to Extensions > Manage > Install > Install from Folder tab 1
In case you cannot upload files because the zip file is too large (more than the limit your web server allows you to upload, there is an alternative to install it from web folder.
- Extract zip extension file to your computer, eg
../myDocuments/myNewExtension - Write inside the Install Directory field 2 the full path to your joomla! tmp folder as your web server sees it, not as url. In linux server it might look like this:
/home/user2/public_html/mysite.com/tmp - Upload 3 the extracted folder to
/tmpfile of your joomla installation, eg../tmp/myNewExtension. You may use an FTP or SSH client or the File Manager from your web hosting Control Panel
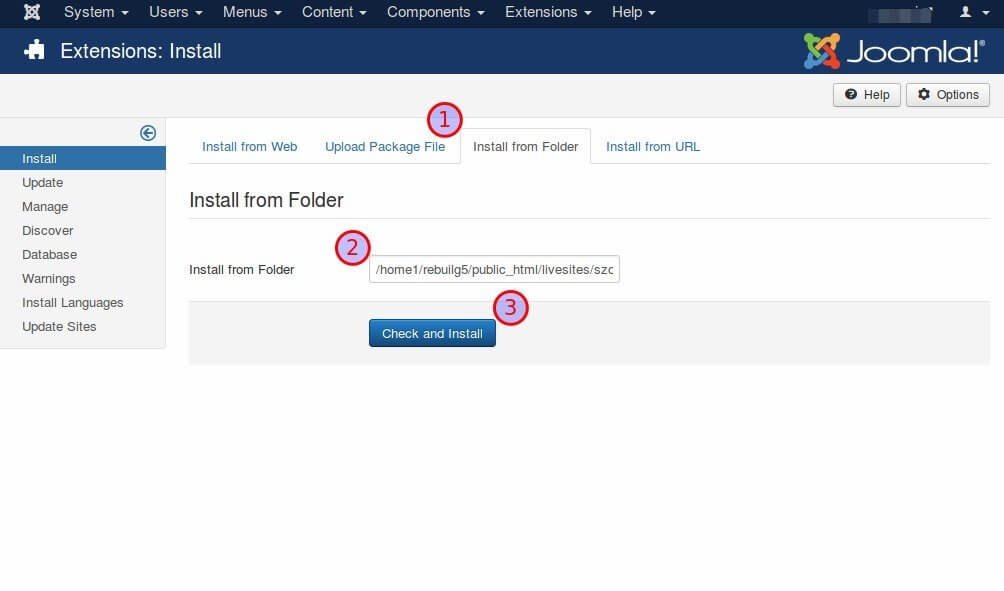
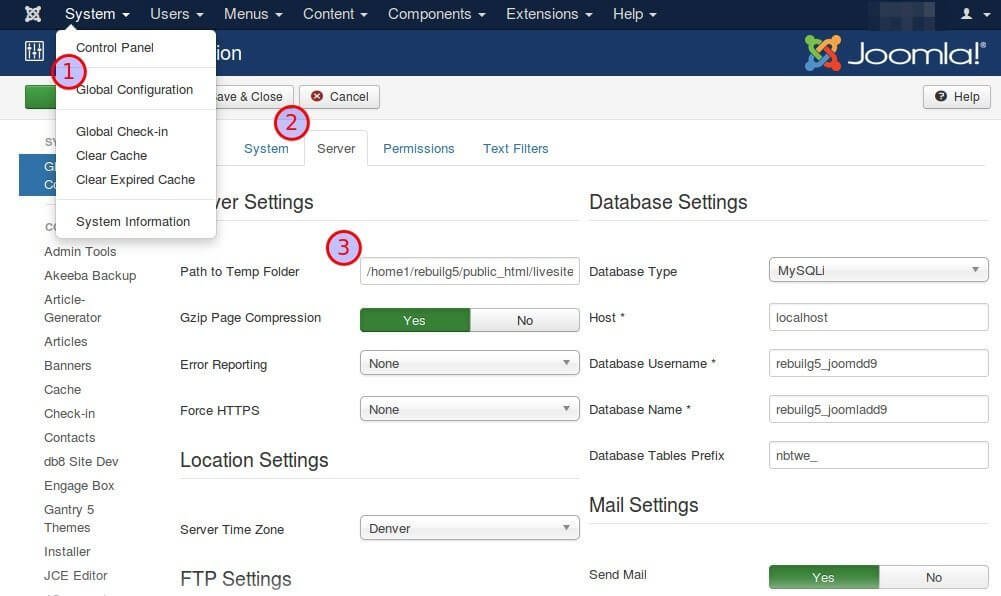
If you have install joomla correctly, high chances are that the path would be applied by default, otherwise you can copy paste it from
System > global Configuration 1 and then Server tab 2 > Server Settings > Path to tmp folder 3
4. Install from URL
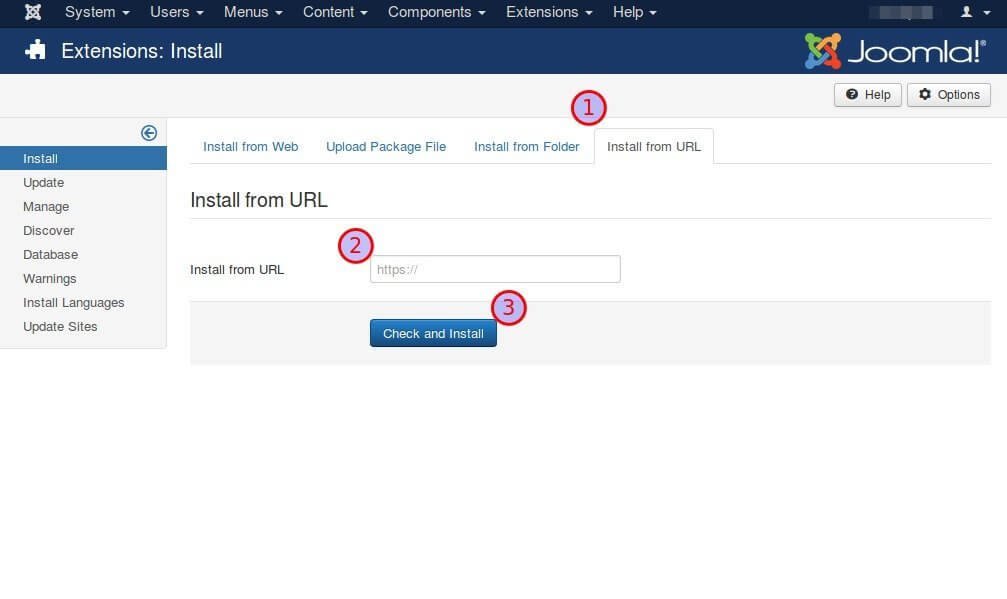
Go to Extensions > Manage > Install > Install from URL tab 1
Some Joomla! Extension providers offer the alternative to install their extensions directly from their server. Just
- add the full url address of the extension package 2. It should be something like
http://www.domain.com/com_myextension.zip ClickCheck and Installbutton 3
5. Discover
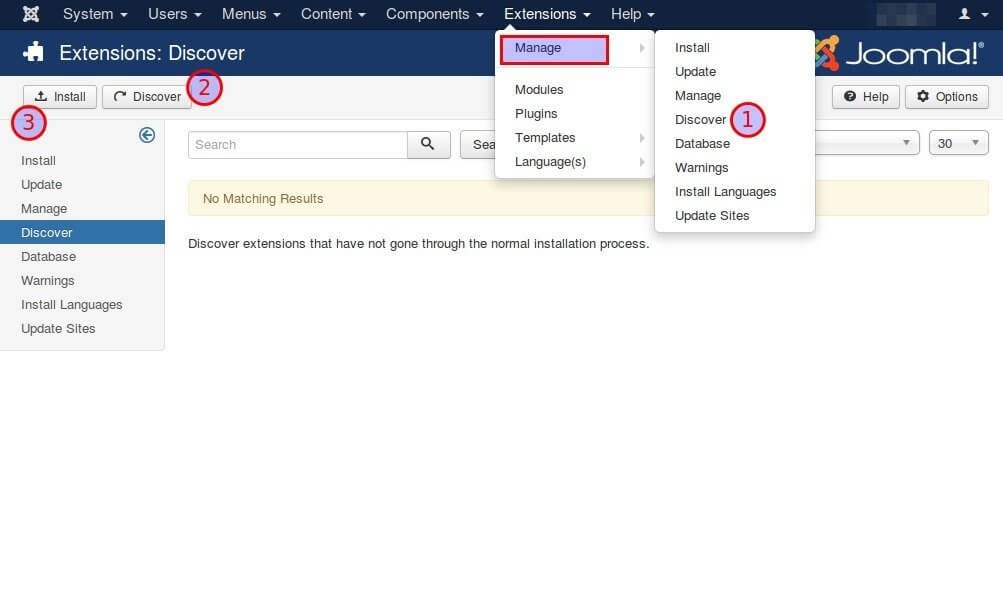
Go to Extensions > Manage > Discover 1
It is very rare to use this option. It is used in special occasions by advanced users mostly, such as developers. You will use this option to discover extensions that have not gone through the normal installation process. It requires that all extension files have been already uploaded, extracted and placed in the appropriate joomla folders but Joomla! System is not aware of them yet (eg after a manual update).
- Select
Discoverbutton 2 - Tick the extensions to be installed (if any)
- Click
Installbutton 3
Now you are ready to install the extensions of your choice and create a marvelous website with Joomla!. If you found this post useful, please
share it or leave a comment below.
We would be happy to answer any question!